
gaggia brera user manual
Gaggia Brera User Manual: A Comprehensive Guide
This manual details the Gaggia Brera’s features‚ offering guidance from initial setup to advanced functions like the adaptation system and troubleshooting common issues.
Welcome to the world of authentic Italian espresso! The Gaggia Brera is a fully automatic espresso machine designed to bring café-quality coffee into your home with ease. This machine combines sleek aesthetics with intelligent technology‚ offering a user-friendly experience for both coffee novices and enthusiasts.
This introduction serves as your starting point for understanding the Brera’s capabilities. We’ll guide you through its features‚ from the integrated grinder and adjustable settings to the innovative Gaggia Adaptation System. The Brera is engineered for convenience‚ consistently delivering rich‚ flavorful coffee. Explore this manual to unlock its full potential and enjoy a truly exceptional coffee experience.
Unboxing and Initial Setup
Carefully unpack your Gaggia Brera‚ ensuring all components are present. These include the machine itself‚ the water tank‚ bean container‚ portafilter‚ and this user manual. Inspect for any shipping damage before proceeding.
Before first use‚ remove all protective packaging and stickers. Rinse the water tank and drip tray thoroughly. Fill the water tank with fresh‚ filtered water and insert it securely. Add coffee beans to the bean container. Connect the machine to a grounded power outlet. Perform a preliminary rinse cycle by running water through the system without coffee grounds‚ following the on-screen prompts. This prepares the machine for optimal performance.
Component Overview: Parts Diagram
The Gaggia Brera features several key components. The water tank provides the water reservoir‚ while the bean container stores your favorite coffee beans. The portafilter securely holds the coffee grounds during brewing. The brew group is the heart of the machine‚ responsible for extracting the espresso.
The drip tray collects any spills‚ and the control panel allows you to adjust settings. A detailed parts diagram (refer to the manual PDF) illustrates each component’s location and function. Understanding these parts is crucial for maintenance and troubleshooting. Familiarize yourself with their names and positions for efficient operation and cleaning procedures.

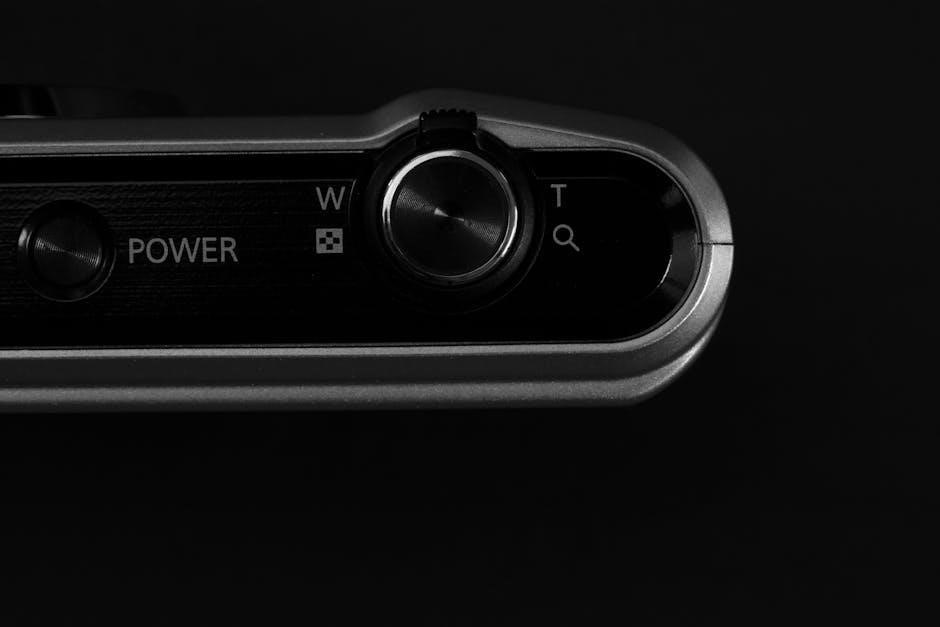
Understanding the Control Panel
The control panel offers intuitive button functions and display indicators‚ enabling users to customize coffee strength‚ length‚ and access advanced features easily.
Button Functions Explained
The Gaggia Brera’s control panel features several buttons‚ each with a specific function. The power button initiates or terminates the machine’s operation. Dedicated buttons allow for single or double espresso preparation‚ offering convenience for various preferences. The ‘Menu’ button accesses the settings‚ enabling adjustments to coffee strength‚ temperature‚ and other parameters.
Furthermore‚ the ‘Confirm’ button validates selections made within the menu. The hot water button dispenses hot water for teas or other beverages. Understanding these functions is crucial for optimal operation. Refer to the detailed manual (Brera20-R-DE20_2002.pdf) for a comprehensive overview of each button’s capabilities and associated settings. Proper utilization ensures a personalized brewing experience.
Display Indicators and Meanings
The Gaggia Brera’s display provides vital information regarding the machine’s status. Indicators signal when the water tank requires refilling‚ or when the bean container is low. Error messages‚ though not extensively detailed in all versions (potentially version-dependent‚ like SUP037RG)‚ alert users to potential issues needing attention.
The display also shows the progress of brewing cycles and confirms setting adjustments made through the menu. A flashing indicator might signify the machine is warming up or undergoing a cleaning cycle. Consulting the official manual (Brera20-R-DE20_2002.pdf) is essential for deciphering specific error codes and understanding all display signals for optimal performance.
Adjusting Coffee Settings
The Gaggia Brera allows customization of your coffee experience. Users can modify coffee strength and length to suit their preferences. The integrated grinder offers adjustable settings‚ impacting the coffee’s flavor profile; experimenting with these settings is encouraged.
Crucially‚ the Gaggia Adaptation System learns your habits. It prompts you to brew several coffees after changing bean types or grinder settings‚ automatically optimizing the brewing process. This system ensures consistently excellent results. Refer to the manual for detailed instructions on navigating these settings and maximizing the Brera’s potential for personalized coffee creation.

Brewing Your First Coffee
Begin by filling the water tank and adding coffee beans. Select your desired coffee strength and length‚ then initiate the brewing process for optimal results.
Filling the Water Tank
The Gaggia Brera features a removable water tank‚ conveniently located at the rear or side of the machine‚ depending on the model. To fill‚ gently remove the tank‚ ensuring it’s detached from the machine entirely. Rinse the tank thoroughly with fresh‚ potable water before each filling to maintain optimal hygiene and coffee flavor.
Fill the tank with fresh‚ filtered water up to the ‘MAX’ indicator‚ avoiding overfilling. Using filtered water is highly recommended to prevent scale buildup and prolong the machine’s lifespan. Reinsert the tank securely back into its designated slot‚ ensuring it clicks into place. The machine will not operate if the tank isn’t properly seated. Always check the water level before each brewing cycle.
Adding Coffee Beans
The Gaggia Brera’s bean container is typically located on top of the machine‚ often covered by a lid to preserve bean freshness. Lift the lid to access the bean hopper. It’s crucial to use whole bean coffee for the best flavor and aroma; pre-ground coffee is supported but may affect the brewing quality.
Fill the container with your preferred coffee beans‚ avoiding overfilling beyond the ‘MAX’ indicator. Using a variety of beans allows you to explore different flavor profiles. Ensure no foreign objects‚ like debris or broken beans‚ enter the hopper. Close the lid securely to maintain bean freshness and prevent moisture from entering. Regularly check bean levels before brewing.
Selecting Coffee Strength and Length
The Gaggia Brera allows customization of coffee strength and length‚ tailoring each brew to your preference. Utilize the control panel buttons to adjust these settings before initiating brewing. Strength is often controlled by the amount of ground coffee used per brew‚ while length determines the volume of water dispensed.
Experiment with different combinations to discover your ideal cup. A stronger setting delivers a more intense flavor‚ while a longer setting produces a larger volume of coffee. The machine’s adaptation system learns your preferences over time‚ automatically adjusting settings for optimal results. Remember to save your preferred settings for consistent brewing.
Maintenance and Cleaning
Regular cleaning ensures optimal performance and longevity of your Gaggia Brera. Daily tasks‚ descaling‚ and brew group cleaning are crucial for consistent results.
Daily Cleaning Procedures
To maintain your Gaggia Brera’s performance‚ implement these daily cleaning steps. After each use‚ empty the drip tray and grounds container to prevent overflow and maintain hygiene. Rinse both components thoroughly with warm water. Wipe down the exterior of the machine with a damp cloth‚ avoiding abrasive cleaners. The brewing unit should also be wiped clean. Regularly check and clean the water tank to prevent limescale buildup‚ ensuring fresh-tasting coffee. Pay attention to the steam wand‚ if applicable‚ wiping it down immediately after each use to remove milk residue. Consistent daily maintenance contributes significantly to the longevity and optimal functioning of your Gaggia Brera‚ delivering consistently excellent coffee.
Descaling the Machine
Regular descaling is crucial for your Gaggia Brera’s longevity and performance. Limescale buildup can affect brewing temperature and coffee quality. Use a commercially available descaling solution specifically designed for coffee machines‚ following the product’s instructions carefully. Typically‚ this involves adding the solution to the water tank‚ running a brewing cycle without coffee‚ and then rinsing thoroughly with fresh water. Repeat the rinsing process several times to eliminate any residual descaling agent. The frequency of descaling depends on water hardness; consult your water report or the Gaggia manual for guidance;
Cleaning the Brew Group
Maintaining a clean brew group is essential for optimal espresso extraction. Regularly remove the brew group and rinse it thoroughly under running water‚ removing any coffee residue. Pay close attention to the internal components‚ ensuring they are free from grounds. For a deeper clean‚ use a dedicated brew group cleaning tablet and follow the machine’s cleaning cycle instructions. Lubricate the brew group seals with a food-safe silicone grease after cleaning to ensure a proper seal and smooth operation. A clean brew group guarantees flavorful coffee and prevents blockages.
Troubleshooting Common Issues
This section addresses frequent problems‚ including error messages‚ coffee brewing failures‚ and grinder malfunctions‚ offering solutions for a seamless experience.
Error Messages and Solutions
Decoding error messages is crucial for resolving issues with your Gaggia Brera. While specific codes may vary based on the machine’s version (like SUP037RG)‚ understanding the general indicators is key. The manual (REV00_EN.pdf) and online resources (cafegaggia.co.uk) provide detailed explanations. Common errors relate to the water tank‚ bean container‚ or brewing unit.
If an error appears‚ first consult the display panel for the specific code. Then‚ refer to the user manual for the corresponding solution. Often‚ simply refilling the water tank or adding beans will resolve the issue. For more complex problems‚ a descaling cycle or brew group cleaning might be necessary. Remember to always prioritize safety and disconnect the machine before performing any maintenance.
Coffee Not Brewing
If your Gaggia Brera isn’t brewing‚ several factors could be at play. First‚ ensure the water tank is adequately filled and correctly inserted. Next‚ verify the bean container holds sufficient beans and isn’t obstructed. A clogged brew group is a frequent culprit; initiate a cleaning cycle as described in the maintenance section of the manual.
Also‚ check for error messages on the display panel‚ as these provide specific diagnostic clues. If the grinder isn’t functioning‚ investigate potential blockages. Finally‚ confirm the machine is properly powered on and hasn’t entered a standby mode. Refer to the troubleshooting section and the REV00_EN.pdf manual for detailed guidance.
Grinder Issues
If you encounter problems with the Gaggia Brera’s grinder‚ first ensure no foreign objects (like stray bean fragments) are lodged within. A common issue is inconsistent grinding due to bean type; experiment with different roasts or adjust the grind setting. Regularly cleaning the grinder is crucial – refer to the maintenance section for detailed instructions.
If the grinder is making unusual noises or failing to operate altogether‚ consult the REV00_EN.pdf manual for specific troubleshooting steps. The adaptation system might need recalibration if grind consistency is off. Remember to always unplug the machine before attempting any internal inspection or cleaning of the grinder mechanism.

Advanced Features
Explore the Gaggia Adaptation System‚ pre-ground coffee options‚ and the convenient hot water function for teas and other beverages‚ enhancing your brewing experience.
The Gaggia Adaptation System
The Gaggia Adaptation System is a smart feature designed to optimize brewing based on your chosen coffee beans. It learns your preferences by monitoring brewing parameters during initial use. To activate‚ prepare several coffees as instructed‚ allowing the machine to analyze and adjust the grinding and brewing process.
If you change coffee bean types or adjust the grinder settings‚ repeat this adaptation process. This ensures the machine consistently delivers the best possible flavor extraction for your current setup. Remember to replace the coffee blend or adjust the grinder as needed for optimal results‚ following the manual’s guidance for a truly personalized coffee experience.
Using Pre-Ground Coffee
The Gaggia Brera offers the flexibility of using pre-ground coffee when you prefer. Access the pre-ground coffee compartment‚ typically located near the bean container. Add the desired amount of pre-ground coffee‚ ensuring it’s not overfilled. Select the appropriate function on the control panel to initiate brewing with pre-ground coffee.
Remember that using pre-ground coffee may not deliver the same freshness and aroma as freshly ground beans. Adjust the coffee strength and length settings to achieve your desired taste. Regularly clean the pre-ground coffee compartment to prevent clumping and ensure optimal performance‚ following the cleaning instructions in the manual.
Hot Water Function
The Gaggia Brera features a convenient hot water function‚ ideal for preparing teas‚ infusions‚ or simply warming cups. Access this function through the control panel – typically a dedicated button or a menu option. Position a suitable container under the hot water spout before initiating the process.
The machine will dispense hot water at a controlled temperature. Be cautious as the water is very hot! Adjust the quantity of water dispensed according to your needs. Regularly descale the machine to maintain optimal performance of the hot water function and prevent mineral buildup. Refer to the descaling instructions in the manual.

Technical Specifications
The Gaggia Brera boasts specific power‚ water tank‚ and bean container capacities crucial for understanding its operational limits and suitability for your needs.
Power Requirements
Understanding the Gaggia Brera’s power needs is essential for safe and optimal operation. This machine is typically designed to operate on a standard household electrical supply. Specifically‚ it generally requires a voltage of 220-240V and a frequency of 50/60Hz. The power consumption usually falls within the range of 1400-1700 Watts‚ depending on the brewing cycle and whether the machine is heating up.
Always ensure your electrical outlet meets these specifications before plugging in the machine. Using an incorrect voltage can cause damage to the internal components and void the warranty. It’s also recommended to use a dedicated circuit to avoid overloading‚ especially if other high-wattage appliances are connected to the same circuit. Refer to the machine’s nameplate for the precise power requirements for your specific model.
Water Tank Capacity
The Gaggia Brera features a removable water tank designed for convenient filling and cleaning. Typically‚ the water tank capacity is around 1.4 liters (approximately 47.3 ounces). This size allows for brewing multiple coffees before requiring a refill‚ making it suitable for both individual and small-group use.
It’s important to use fresh‚ filtered water in the tank to ensure the best possible coffee flavor and to minimize scale buildup within the machine. Regularly check the water level indicator on the tank to avoid running the machine dry‚ which could potentially damage the pump. The tank is easily accessible for removal‚ filling‚ and cleaning‚ contributing to the overall ease of maintenance.
Bean Container Capacity
The Gaggia Brera’s bean container is designed to hold approximately 250 grams (around 8.8 ounces) of whole coffee beans. This capacity strikes a balance between convenience and freshness‚ allowing you to store a reasonable amount of beans without compromising their aroma and flavor over extended periods.
It’s recommended to use freshly roasted beans for optimal results and to avoid storing beans for too long. The container is typically airtight to help preserve bean quality. Regularly check the bean level and refill as needed to ensure uninterrupted brewing. The container is easily removable for filling‚ simplifying the process of adding your favorite coffee beans.

Safety Precautions
Always follow essential safety instructions‚ ensuring electrical safety and preventing machine damage during operation and maintenance for a secure experience.
Important Safety Instructions
Before operating your Gaggia Brera‚ carefully read all instructions. This appliance is intended for household use only. Ensure the voltage of your outlet matches the machine’s requirements. Never immerse the appliance in water or any other liquid. Do not operate the machine with a damaged cord or plug.
Keep the appliance out of reach of children. Supervision is necessary when used near children. Allow the machine to cool completely before cleaning. Avoid touching hot surfaces. Unplug the machine before cleaning or performing maintenance. Do not use outdoors. Use only genuine Gaggia accessories. Failure to follow these instructions may result in injury or damage to the machine.
Electrical Safety
To prevent electrical shock‚ never operate the Gaggia Brera with a damaged cord or plug. If the power cord is damaged‚ it must be replaced by the manufacturer‚ its service agent‚ or similarly qualified persons. Do not use an extension cord. Ensure the outlet is properly grounded.
Always unplug the machine before cleaning or performing any maintenance. Do not touch the plug with wet hands. Avoid running the power cord over sharp edges or hot surfaces. Never attempt to repair the appliance yourself. Contact authorized service personnel for any repairs. Improper electrical connections can create a fire hazard or risk of electric shock.
Avoiding Damage to the Machine
Protect your Gaggia Brera from damage by using only fresh‚ cold water in the tank. Avoid using hard water‚ as it can cause scale buildup and affect performance. Never immerse the machine in water or any other liquid. Do not operate the machine without water in the tank.
Regularly clean the brew group and other components as instructed. Avoid using abrasive cleaners or scouring pads‚ as they can scratch the surfaces. Do not disassemble any parts beyond what is described in this manual. Improper use or maintenance can void the warranty and damage the machine.

Warranty Information
The Gaggia Brera warranty covers defects in materials and workmanship. Contact customer support for details‚ registration‚ and service options available to you.
Gaggia Brera Warranty Details
The Gaggia Brera is covered by a limited warranty‚ protecting against manufacturing defects for a specified period. This warranty typically begins from the original date of purchase‚ and proof of purchase is essential for any claim. The warranty covers parts and labor required to correct defects arising from normal use. However‚ it does not cover damage resulting from misuse‚ accidents‚ improper maintenance‚ or unauthorized repairs.
Specifically‚ the warranty excludes issues caused by scale buildup‚ incorrect water quality‚ or failure to follow the cleaning procedures outlined in the user manual. To initiate a warranty claim‚ customers should first contact Gaggia customer support‚ providing details of the issue and proof of purchase. Gaggia will then guide the customer through the necessary steps‚ which may include troubleshooting or arranging for repair or replacement.
Contacting Customer Support
For assistance with your Gaggia Brera‚ several customer support avenues are available. The official Gaggia website (cafegaggia.co.uk) provides a comprehensive FAQ section and downloadable manuals‚ including the REV00_EN.pdf version. Direct contact can be made via phone or email‚ details of which are typically found on the Gaggia website or within the product documentation.
When contacting support‚ be prepared to provide your machine’s model number‚ serial number‚ and a detailed description of the issue you are experiencing. Having your proof of purchase readily available will expedite the process‚ particularly for warranty-related inquiries. Online forums and communities dedicated to Gaggia products can also offer peer-to-peer support and troubleshooting advice.